With our Products Bulk Import Export For WooCommerce add-on, managing your products effortlessly becomes a breeze! Export your products into a .xls or .xlsx file with just a single click. Additionally, create and edit products directly using a simple template, allowing seamless import into any WooCommerce-enabled site with remarkable efficiency.
Below, you’ll find the instructions guiding you through the installation, configuration, and process of importing/exporting products using this invaluable add-on.
Installation #
- Install the Woocommerce plugin & activate it.
- Install the Products Bulk Import Export For WooCommerce add-on and activate it.
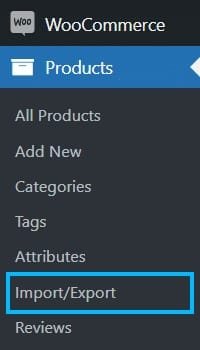
- A new Import Export submenu will be added under the main Products menu.
Activate Your License Key #
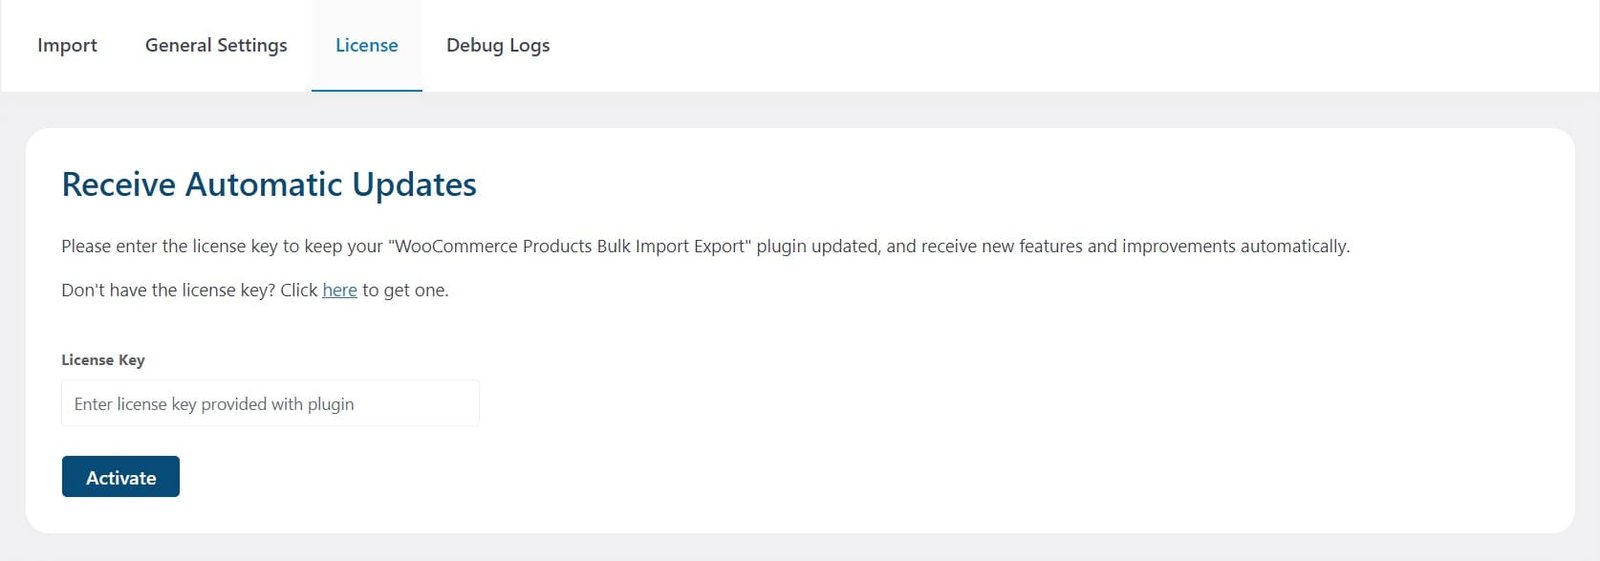
You can set up your license key by navigating to the License tab located on the primary menu of WooCommerce Import/Export. Upon purchase, the license keys will be delivered to your email address.
Simply enter your license key into the designated field and then click on the Activate button.
General Settings #
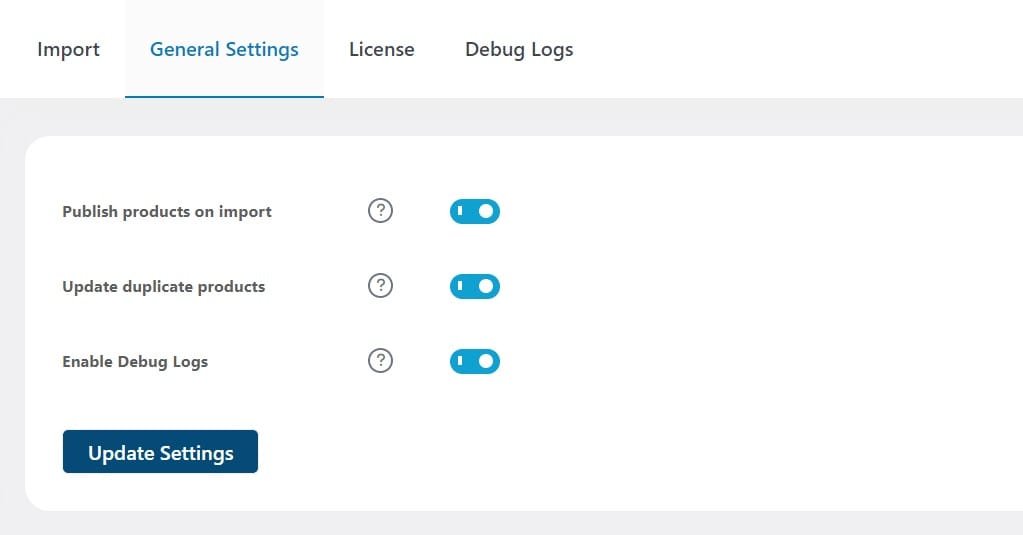
Publish product on import #
Enable this toggle if you want to publish the products on import. By default, the imported products status will be Pending.
Update duplicate products #
When this option is enabled, a new product won’t be created if a product with the same title already exists. Instead, the pre-existing product will be updated.
Enable Debug Logs #
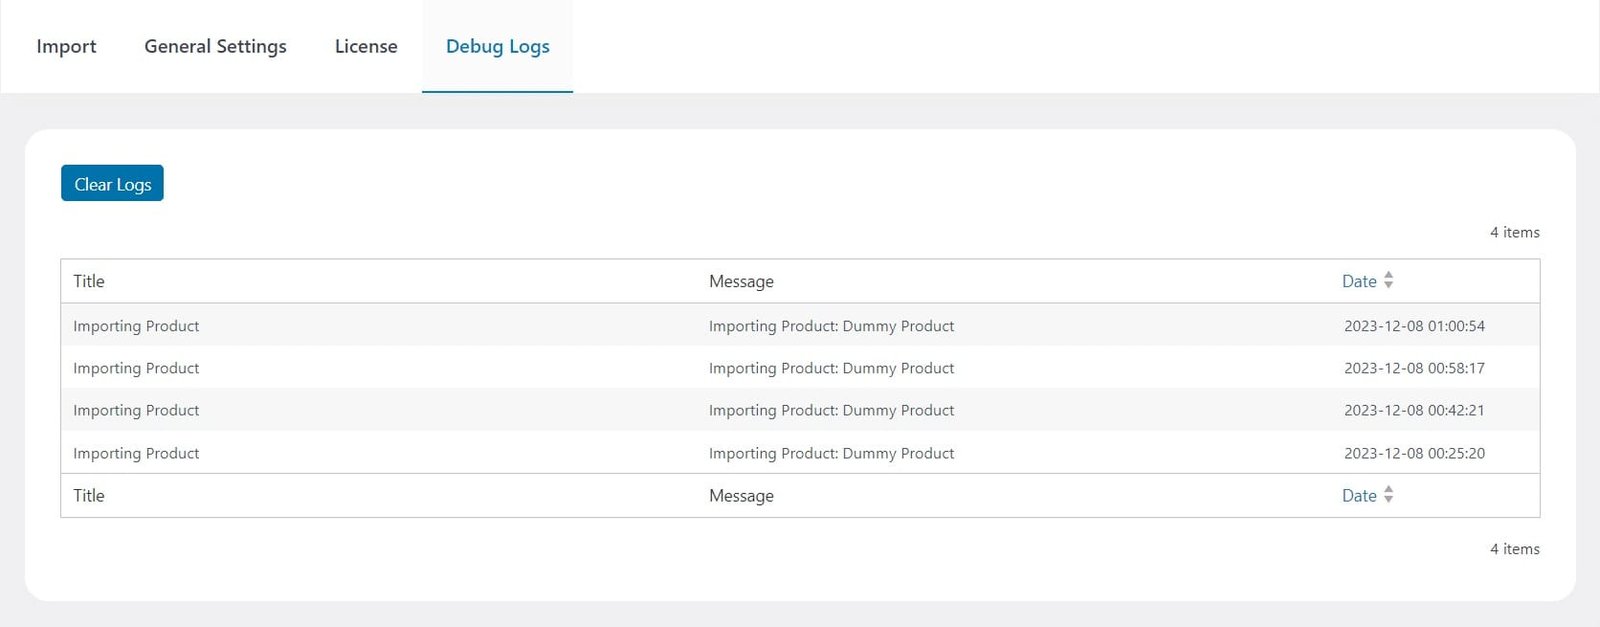
Enabling the “Enable Debug Logs” toggle in the general settings tab allows the system to generate import debug logs, which offer valuable information and insights for troubleshooting any potential issues.
Import Products #
Template #
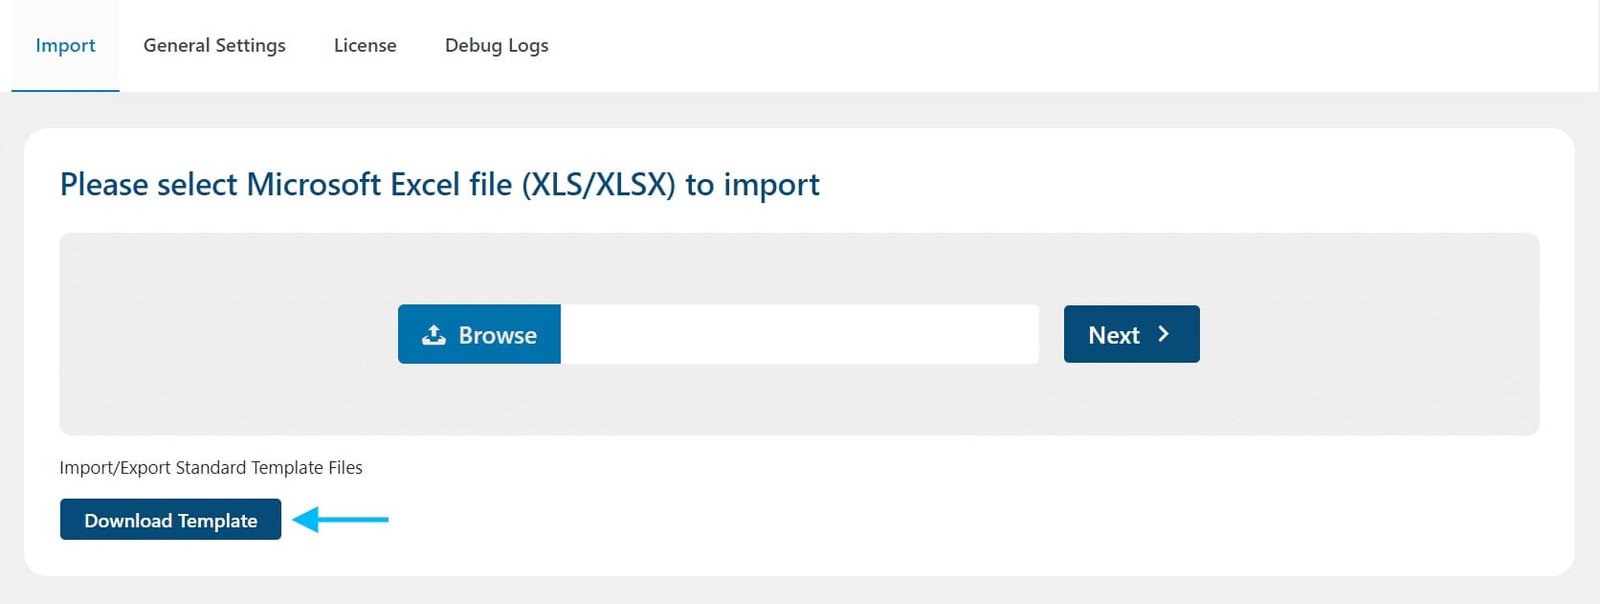
The Products Bulk Import Export For WooCommerce addon template is easily accessible and with a click, you can download its .xls files from the “Import” tab.
Single Product #
To import a product, navigate to the “Import” tab from the Import/Export menu. Here, you will find the input area for the product file to be imported. To complete the import, select the Microsoft Excel .xls or .xlsx file and click on the Next button.
Multiple Products #
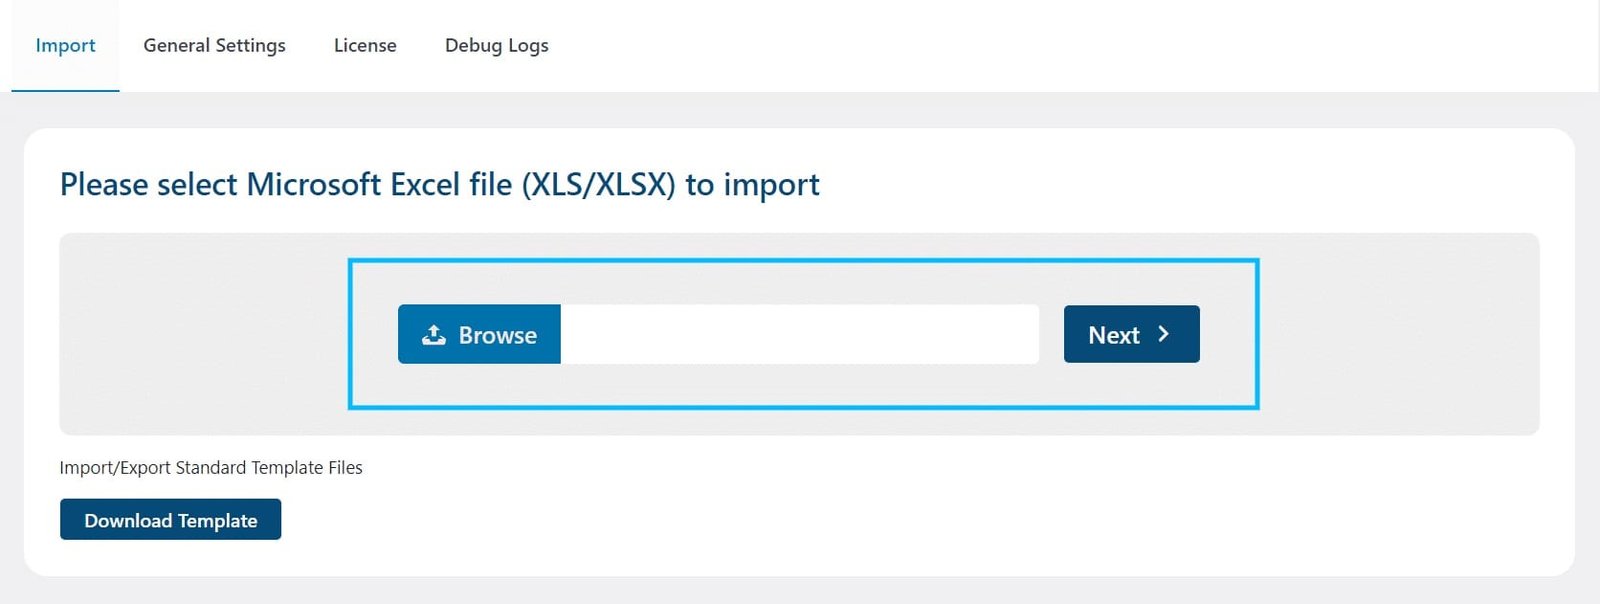
You can import several products at once by adding a different product on each separate row of your spreadsheet file. Then, to import all created products, go to the Import tab from the Import/Export menu. Here, select the Microsoft Excel .xls or .xlsx file containing products and click on the Next button.
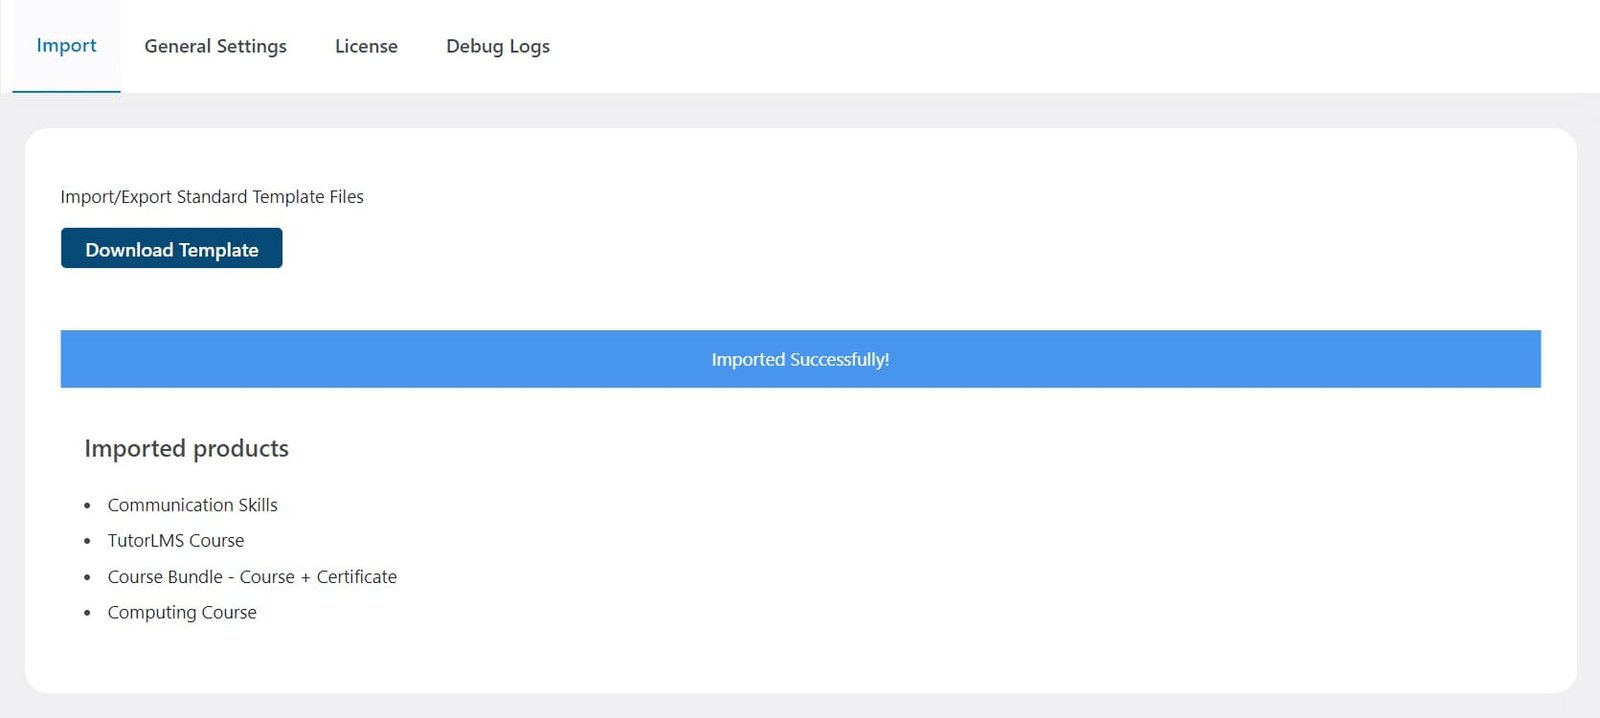
After importing the file, you will see all imported products listed on your screen like this:
Export Products #
Single Product #
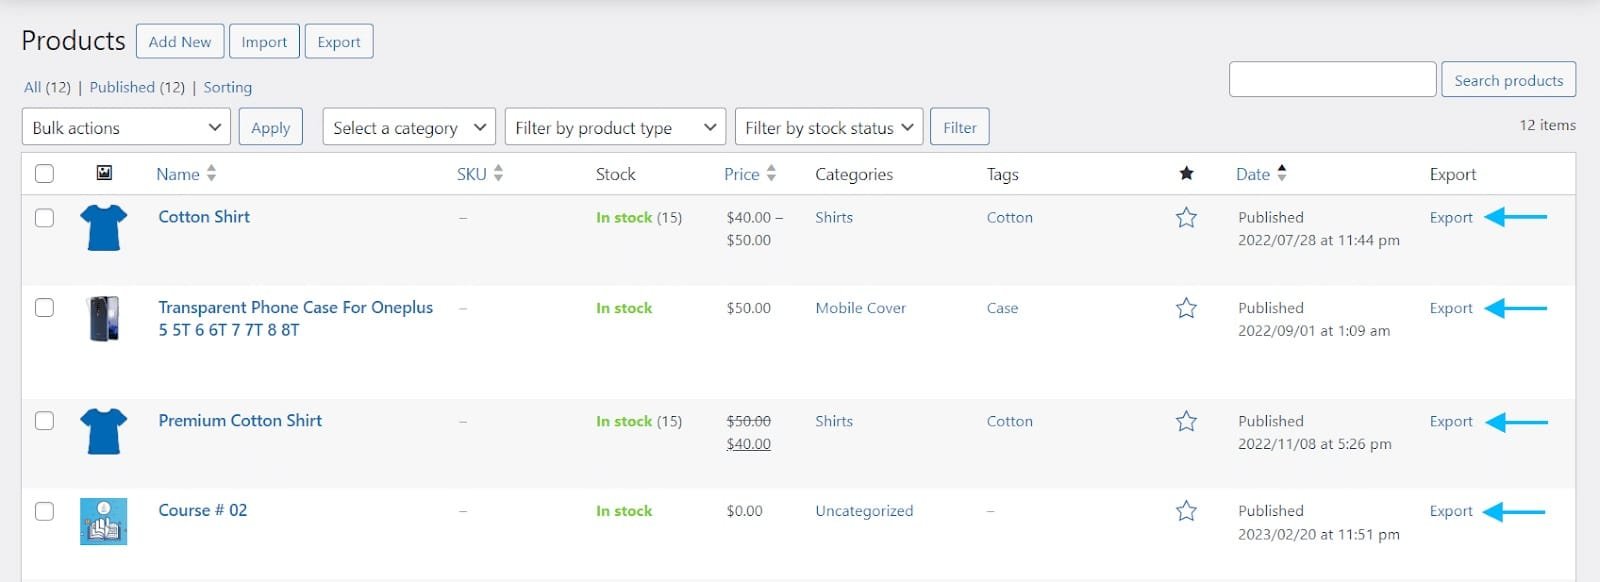
When the Products Bulk Import Export For WooCommerce add-on is enabled on your site, a new Export button will be visible in the Products table next to each product. This button is located within the column labeled Export. To export a product, click on the export button, and the product will be downloaded as a .xlsx file.
Multiple Products #
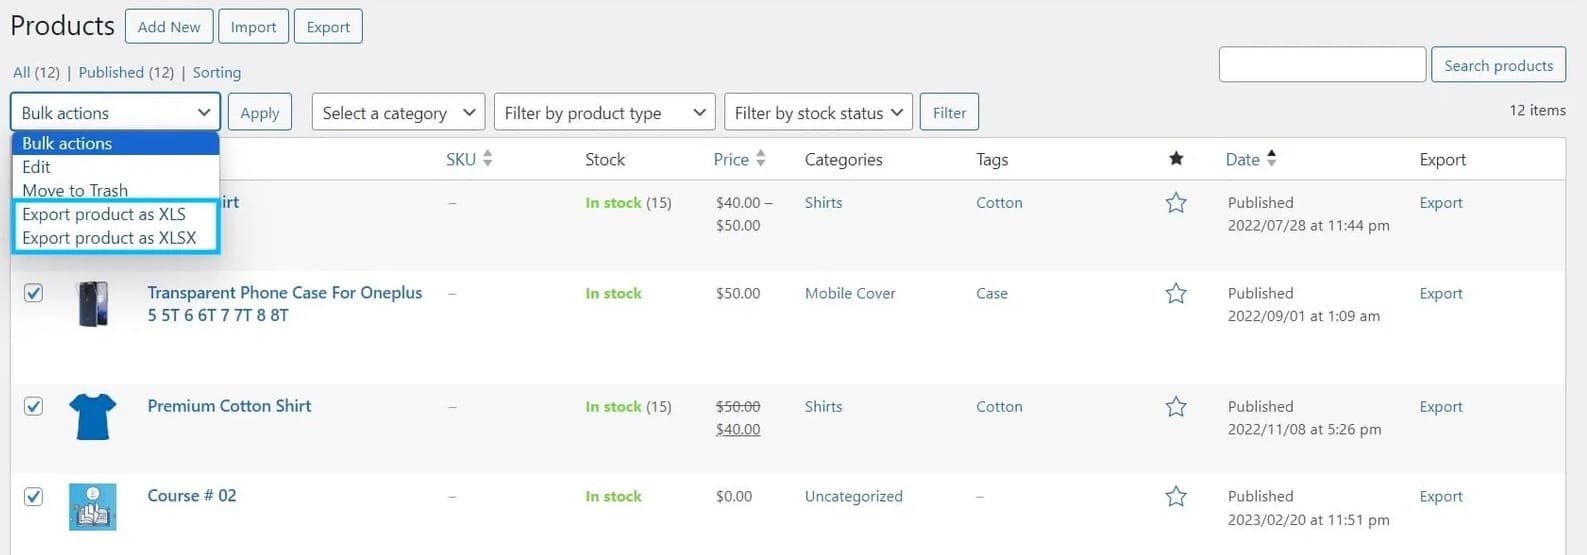
When the Products Bulk Import Export For WooCommerce add-on is enabled on your site, you can export multiple products in a single file. To export multiple products at once, simply check on the products you want to export, and from the Bulk Actions WordPress dropdown, select “Export product as XLS” or “Export product as XLSX” and click on the Apply button.
Template Guide #
Products Bulk Import Export For WooCommerce uses a standard template to import and export all WooCommerce products. This template should be filled in the given order to create your templates for import/export.
Downloading The Template #
The standard template can be found in the addon folder:
products-bulk-import-export-for-woocommerce > Sample-import-files > Wc-product-template.xlsx

On import, the template should be filled with the necessary product-related content and settings, following the specified order outlined below:
- ID
Enter the Unique Product ID in numbers. This field will show the Product ID when you export any product.
- Type
This column is used to specify the type of content being imported. In this sheet, this field should be set to “product”.
- Name
Set the Product name to be displayed to the customers.
- Slug
Set the product slug to be displayed to the customers, which forms part of the product’s permalink.
- Date Created
Set the date and time on which the product entry is created. Format: “mm/dd/yyyy hh:mm:ss” or “dd-mm-yyyy hh:mm:ss”.
- Date Modified
Set the date and time on which the product entry was last modified. Format: “mm/dd/yyyy hh:mm:ss” or “dd-mm-yyyy hh:mm:ss”.
- Status
Set the product status. Options include: draft, publish, pending, private, trash.
- Featured
You use it to set whether this product should be featured or not. Options include: 1 (Yes, featured),0 (Not featured).
- Catalog Visibility
Set the visibility for your product. Options include: visible, catalog, search, hidden.
- Description
Set the product description to show to the customers.
- Short Description
Set the short product description to show to the customers.
- SKU
Set the Stock Keeping Unit to identify the different products. It should be in text and Unique.
- Price
Set the product price to show to the customers.
- Regular Price
Set the regular product price (Normal price) to show to the customers. It should be in a Decimal number.
- Sale Price
Set the sale product price to show to the customers. It should be in a Decimal number.
- Date on Sale From
Set the product sale starting date and time. Format: “mm/dd/yyyy hh:mm:ss” or “dd-mm-yyyy hh:mm:ss”.
- Date on Sale To
Set the product sale ending date and time. Format: “mm/dd/yyyy hh:mm:ss” or “dd-mm-yyyy hh:mm:ss”.
- Total Sales
Set the total product sales in numbers.
- Tax Status
Set the tax status to identify whether your product is taxable or not. Options include: taxable, shipping, none
- Tax Class
Set the Tax class of your product. Options include: zero-rate, reduced-rate, and Leave blank column (if the value should be Standard Rate).
- Manage Stock
Set it to define Whether or not you are managing stock for the product.Options include: 0(No) /1(Yes).
- Stock
Set it to define the number of items you have in stock. It should be in numbers.
- Stock Status
Set Whether you have any product in stock or not. Options include: instock, outofstock.
- Backorders
Set Whether you’re accepting backorders. Options include: yes, no, notify
- Low Stock Amount
Set the amount for when you would consider the product stock to be low. It should be in numbers.
- Sold Individually
Set whether the product only be sold on its own. Options include: 0(No) /1(Yes).
- Weight
Set product weight in numbers or decimals.
- Length
Set product length in numbers or decimals.
- Width
Set product width in numbers or decimals.
- Height
Set product height in numbers or decimals.
- Upsell IDs
Set the upsell product IDs to which you wish to upsell. Format: multiple IDs separated by a “|” character.
- Cross Sell IDs
Set the cross-sell product IDs that can be purchased with this product. Format: multiple IDs separated by a “|” character.
- Parent ID
Set the Parent product of the variation. This should be that product’s ID.
- Reviews Allowed
Set if customers are allowed to give a review on the product or not. Format: 0 (No) or 1(Yes).
- Purchase Note
Set the purchase note of the product for the customers.
- Attributes
Set the local product attributes. Format: Attribute 1 | Attribute 2 | Attribute 3
- Default Attributes
Set the default value of the local attribute. It is used only by variable products. It should be text.
- Menu Order
Use this to sort your products. It should be in numbers.
- Post Password
Use it if your post is private, including the password. Set the private post password in it.
- Virtual
Set Whether your item is a non-physical object or not. Format: 0 (No) or 1(Yes).
- Downloadable
Whether your product is downloadable or not. Format: 0 (No) or 1(Yes).
- Category IDs
Set the categories IDs your product is a part of. Format: Category 1, Category 2
- Tag IDs
Set the Tag IDs your product is a part of. Format: Tag 1, Tag 2
- Shipping Class ID
Set the Shipping Class of the product. It should be in the text.
- Downloads
Set the storage location (URL) of the product. Format: URL-1
- Image ID
Set the storage location(URL) of the product image. Format: URL-1
- Gallery Image IDs
Set the storage location(URL) of the product image. Format: URL-1, URL-2
- Download Limit
Set the Maximum number of downloads for a product. It should be in numbers.
- Download Expiry
Set the Date on which the download expires. Format: “mm/dd/yyyy hh:mm:ss” or “dd-mm-yyyy hh:mm:ss”.
- Rating Counts
Set the product rating count in numbers.
- Average Rating
Set the average product rating in numbers
- Review Count
Set the review count in numbers.
- Meta Data
Set the product metadata. Format: meta: Product Brand.
FAQs #
In how many formats we can import or export products? #
Currently, our addon supports only two formats, .xls and .xlsx.
Is it possible to export from one site and import it into another? #
Yes, if our addon is installed on both sites, you can export from one and import into another.
Where Can I Find A Standard XLS Template? #
The addon zip file includes a standard XLS template for import. The standard XLS template is located inside the zip file provided with the addon here:products-bulk-import-export-for-woocommerce > Sample-import-files
Changelogs #
1.0.1 #
- New: Added React-based Admin UI.
1.0.0 #
- Initial Release.


